Steel Hardness-Basics You Should Know

1. Introduction:
Steel is widely used in a large number of industries such as machine building, aerospace, car and ship building because of its excellent properties.
When choosing the right steel material for your project, the difficulty you often encounter is the judgment of the material hardness, if the hardness is not qualified then it will cause a lot of damage and negative impact on the final product. Based on the desire to give you a thorough understanding of steel hardness, I have written this article based on the collection of a large amount of information, and I hope to be able to help readers and friends in need!
2. Background
When talking about the hardness of steel it is important to mention the historical problems related to the testing of hardness. There have been many generations of technical improvements and evolutions in previous attempts to solve this problem. Below is a more complete report on the history of hardness testing:
As early as 1722, the French scientist Reaumur used a scratching method to test the hardness of metals.
In 1812, Mohs hardness was introduced, specifically to test the hardness of minerals.
At the end of the 19th century, Swedish engineer Johan A. Brinell invented a new method of testing the hardness of metals using a spherical indenter. This became known as the Brinell hardness test.
The concept of a Rockwell hardness tester was developed by Prof. Paul Ludwik in Vienna in 1908, and it was only in 1914 that the American brothers Stanley and Hugh Rockwell further refined and patented a displacement-based method of indentation testing of conical diamonds, which came to be known as Rockwell's hardness testers, and in 1924 they were granted a patent for another instrument design. Developed and popularized, Rockwell hardness testing remains today one of the most effective and widely used methods of hardness testing.
The Vickers hardness test was introduced by Robert L. Smith and George E. Sandland of the United Kingdom in 1921 at Vickers Ltd. Since then, a variety of different types of hardness testing methods have been gradually developed for different materials and application scenarios, providing a powerful tool for the accurate assessment of material properties.
3.Definition Of Steel Hardness
The hardness of steel is its ability to resist scratches, deformations or indentations. The methods for detecting steel hardness mainly include electrochemical Rockwell hardness, heat treated Vickers hardness, electrochemical Brinell hardness, and heat treated Leeb hardness tests, etc. Hardness values indicate the level of rigidity of a material, with higher values indicating higher levels of hardness. The hardness value can indirectly reflect the strength of the metal and the differences in chemical composition, metallurgical organization and heat treatment process of the metal.
Steel hardness is one of the strength considerations for steel products such as steel pipes or steel plates.
4. Hardness Testing Techniques And Types
4.1 Testing Techniques For Hardness
Three kinds of test methods for determining hardness today.
(1) Scratch hardness
(2) Indentation hardness;
(3) Bounce back hardness.
They are differentiated according to different testing techniques.
4.2 Hardness Type
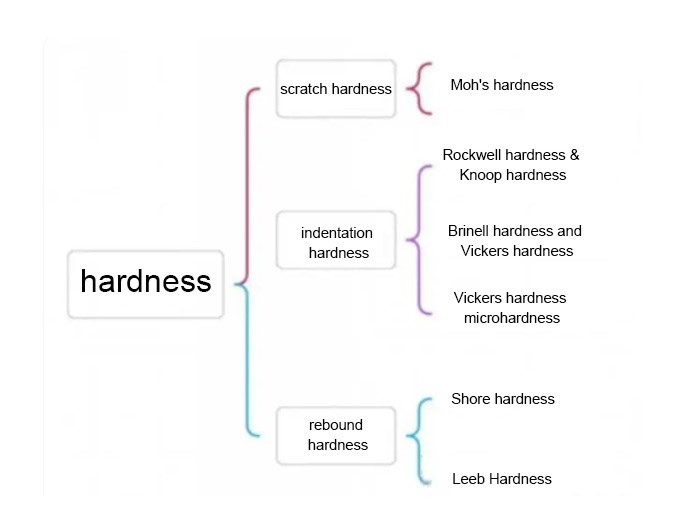
Numerous different materials testing procedures fall under the broad category of material durability testing, including but not limited to Moh's hardness test, Rockwell hardness test, Brinell hardness test, Knoop plastic deformation method, Vickers indentation method, Shore tensile method, Leeb hardness test, etc.
Commonly used Mohs hardness belongs to the scratch hardness, refers to the physical properties of minerals used to describe the ability of minerals to resist being scratched and indentation of other objects, usually with Mohs hardness level 1 ~ 10 to indicate, which the higher the level indicates that the harder the minerals.
Brinell hardness, Vickers hardness, Rockwell hardness, and Mohs hardness are like the rock stars of material hardness. Their hardness values act as a shield, protecting the material from external "squeeze," much like building a strong defensive line on the surface "muscles" of the material to prevent them from undergoing plastic deformation.
Brinell hardness and Rockwell hardness are like the "spring buddies" of hardness testing – they fall into the category of rebound hardness. It's as if they're playing a game of "bounce" on the material's surface, telling us how hard the material is based on the degree of rebound.
5. Hardness Testing Methods:
5.1 Rockwell Hardness Test Method:
5.1.1 Principle:
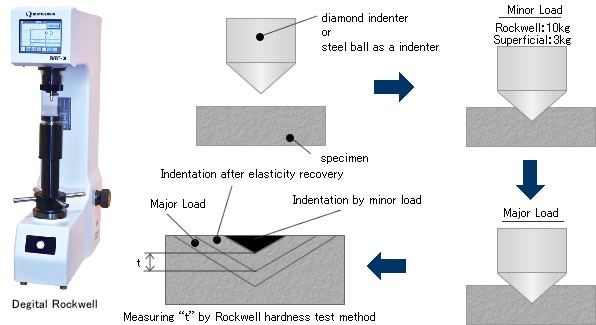
When it comes to measuring material hardness, it's like playing a little game. We use a small tool (could be a diamond cone, steel ball, or tungsten carbide ball) to press into the specimen surface in two steps. Then, after waiting for a specified time, we remove the main test force, measure the depth of the remaining indentation under the initial test force (h), and calculate the Rockwell hardness using the value of h along with the constants N and S:
Rockwell hardness = N - h/S
It's akin to playing a game in the world of hardness measurement, where the depth of the tool's mark tells us how hard the material is.
5.1.2 Scope Of Application:
The Rockwell hardness testing method is like a universal hardness measurement tool, which can easily test various materials, such as metals, plastics, rubber, ceramics, and so on. Especially when measuring the hardness of metals, this thing is like a superhero in hardness testing, able to accurately measure the hardness of various metals such as steel, aluminum, copper, zinc, etc. He is simply an all-around star in hardness testing!
In addition, the Rockwell hardness test can also be used to test materials after surface treatment, such as heat treatment, surface spraying, etc.
5.1.3 Selection Of Ruler:
According to the different hardness of the experimental material, the scale of different hardness range is used to express. Let's unravel the mysteries of hardness testing! HRA hardness is determined using a 60kg load and a diamond cone indenter, perfect for materials with higher hardness. HRB hardness, on the other hand, comes from a 100kg load and a 1.5875mm diameter hardened steel ball, ideal for materials with lower hardness like soft steel, non-ferrous metals, and annealed steel. And then, HRC hardness steps in with a 150kg load and a diamond cone indenter, designed for those high-hardness materials like hardened steel and cast iron. It's like the trio of hardness testing heroes, each with their own unique moves.
5.2 Shore Hardness Test:
At the beginning of the 20th century, in 1906, the American engineer A. F. Shore invented the so-called "Shore hardness" or "rebound hardness" test method. Since the 1990's, SHORE Instruments and FOODSHIELD Manufacturing Company have introduced a new line of Shore hardness testers with models CS, CD and CE. Our manufacturers have been able to produce and offer Shore hardness testers in the C, D and E models. Shore hardness testers are suitable for on-site measurement of large parts and raw materials in the metallurgical and heavy machinery industries due to their portability, ease of operation, rapidity of testing, and shallow and small indentations. Despite its lower accuracy compared with static testing methods, it is still a commonly used hardness testing method.
5.2.1 Testing Principles:
Use a designated diamond hammer to strike the surface of the sample with a fixed weight free fall until it returns to the same altitude, then lift it up and drop it again to strike the same point to measure the Shore hardness of the sample.
5.2.2 Selection Of Test Force
For Shore hardness testing, the test force is usually chosen to be 10 kg or 25 kg. The magnitude of the test force should be selected based on factors such as the thickness and size of the specimen and the type of material.
5.2.3 Calculation Of Hardness Values
The strength of the Shaw hardness can be reflected by measuring the indicators such as the impulse pop-up height and the return speed. In the absence of airflow interference, quantitative measurements can be made according to the physics principle of orderly transformation of kinetic energy and potential energy and sum-weighted treatment to maintain energy balance.
Therefore, to calculate Shaw's hardness you need to master this formula:
HS (C, D) = K * h 2/ h 1
where h2 - punch rebound height;
h1 - punch drop height;
K - coefficient.
5.2.4 Expression Of Hardness Values
Use a designated diamond hammer to strike the surface of the sample with a fixed weight free fall until it returns to the same altitude, then lift it up and drop it again to strike the same point to measure the Shore hardness of the sample.
5.2.5 Types Of Shore Hardness Testers
Shore hardness testers are divided into two types: Type C and Type D. Type C is suitable for softer non-metallic materials such as rubber and plastics; Type D is suitable for harder non-metallic materials such as hard plastics and synthetic rubber.
5.2.6 Advantages And Applications
Shore hardness test has the advantages of easy operation, rapid measurement, good repeatability, etc. It is suitable for hardness testing of non-metallic materials. It has a wide range of applications and can be used for hardness testing of materials such as rubber, plastics, paints and inks. Shore hardness tester is portable, easy to use, can measure the hardness of large workpieces in the field, such as large cold roll acceptance criteria is Shore hardness value.
5.3 Brinell Hardness Test
5.3.1 Principle Of Brinell Hardness Testing

Let's talk about the superhero moves in hardness testing! We use a super hard steel ball or a tungsten carbide small ball with a diameter D as our undercover agent. We apply a mighty test force F to press it into the specimen's surface. After a bit of suspense, we remove the test force, revealing a noticeable indentation with a diameter d. Brinell hardness is like the magic formula proportional to the test force divided by the surface area of the indentation, represented by HB.
In the above formula: D----- diameter of the sphere, mm.
F----test force, kgf(N).
d-----indentation average diameter, mm.
Note: When the unit of test force is in Newtons;
Note: From June 1, 2003, the original national standard GB/T 231-1984 abolished, China's equivalent implementation of international standards, the development of a new national standard GB/T 231.1-2002, the text explicitly canceled the steel ball ball head, all the use of cemented carbide ball head. Due to this, HBS is no longer in use, and HBw and HB are now the chosen representatives for indicating Brinell hardness values. Sometimes even directly use HB to replace HBW.
5.4 Vickers Hardness
A diamond positive tetragonal cone indenter with an angle of 136° is used to press a specified test force F into the surface of the specimen, which is held for a specified time and then removed, and we measure the diagonal length of the impression on the specimen's surface. The marking symbol is post-V.
5.5 Richter Hardness
With the specified quality of the impact body, under the action of a certain force with a certain speed vertical impact on the surface of the sample, to impact the body at a distance of 1 mm from the surface of the specimen rebound speed (vR) and the impact speed (vA) of the ratio to indicate the material's Ricci hardness, the symbol marked as HL.
The Richter hardness tester is easy to operate, high efficiency, suitable for large, heavy workpieces or geometrically complex workpieces. And there's minimal damage to the product's surface, making it occasionally applicable for non-destructive testing. It exhibits unique characteristics suitable for hardness testing in all directions, tight spaces, and special parts.
5.6 Knoop Hardness
The top two opposite sides of the rhombic prismatic cone diamond with a specified angle with a test force pressed into the surface of the specimen, after a specified retention time after the removal of the test force, the measurement of the surface of the specimen indentation of the long diagonal length of the symbol labeled as HK.
It is widely used for testing extremely hard and fragile materials such as enamel, glass, rhinestones, metal ceramics and slag. It is also used to accurately measure the depth of hardened layers.
6. Application of Steel Hardness
The hardness of steel is important in various application scenarios. For example, steels with higher hardness are more suitable for making knives and cutting tools, while steels with lower hardness are more suitable for making structural and mechanical parts that require good toughness. Below are some of the applications of steel hardness in different fields:
In the manufacturing industry, the selection of suitable raw materials and high quality control is very important - this requires different types of metal hardness to be checked to meet the specific needs of each commodity. This is especially true for parts that must have a certain hardness profile, and controlling the quality of raw materials to prevent defects is one of the key steps in achieving efficient production.
In the field of metalworking, steel hardness testing is a key technique to characterize the hardness of the surface layer of a part and its resistance to wear and tear; this is essential to ensure that the object does not lose its shape and dimensions as a result of deformation during use.
In the field of engineering, the hardness of the steel used in buildings is tested to ensure that it is strong enough and has a long service life, resistant to different internal and external environmental factors and force fields.
Automotive industry: In the production of automobiles, steel hardness testing is one of the necessary processes to verify that engine parts and other important components, such as transmissions, are able to withstand the wear and fatigue of long-term use. This test ensures that the cars produced have a high level of reliability and longevity.
Materials Research: Researchers use steel hardness testing to determine the performance of new materials and to optimize the properties and characteristics of existing materials. This method provides insight into the properties of materials that need to be emphasized under various conditions.
Geological exploration: In geoscience and petroleum, steel hardness testing is used to determine the strength of subterranean rocks in order to understand the geological conditions in which gas wells are located and to predict their development potential.
Medical Devices: In medicine, steel hardness testing is a key factor in evaluating and determining the robustness and implantability of medical devices; this technique ensures the reliability and stability of the device during clinical use.
Overall, steel hardness testing has a wide range of applications in a number of fields and is essential to ensure the quality, performance and durability of materials.
7. Tools for Measuring Hardness
7.1 Rockwell hardness tester
Employed to measure the hardness of diverse steels, including alloy steel and stainless steel, this stands out as the paramount and widely utilized category of hardness testing devices.
Meet the Manual Rockwell hardness tester – the OG of steel toughness testing! It's been around the block, measuring the hardness of carbide, hardened steel, and regular ol' steel. But beware, it's not a fan of softer cast iron or plates skinnier than 2 mm – they're a bit too delicate for its taste.
Now, let's talk test forces – we've got three amigos here: HRA, HRB, and HRC. When it comes to hardened steel and mold steel, HRC is the go-to, like the MVP of the hardness world.
But hold on, we've got the Electric Rockwell hardness tester in the house – it's got a digital display, making data reading a breeze. More accuracy? Yes, please!
And for the tech-savvy, we've got the Digital Rockwell hardness tester. It's not just your average tester; it can measure both regular and surface Rockwell hardness. With a range from HRA to K, this bad boy is armed with CPU data processing. Oh, and did we mention it comes with a printer and an RS-232 computer interface? It's like the rockstar of hardness testers!
7.2 Vickers Hardness Tester (Microhardness Tester)
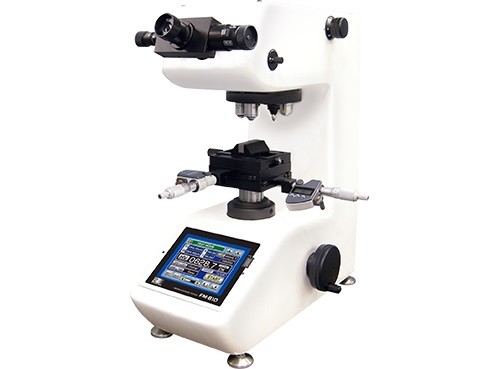
Alright, let's dive into the world of measuring hardness – we've got a tool specifically designed for the job. It's the go-to for checking how tough ferrous metals, non-ferrous metals, hard alloys (like aluminum alloys), and even surface carburizing and nitriding layers are. We express the results in something called HV.
Now, if we're dealing with the surface layer of a material that's a bit on the weak and low hardness side, we bring in the small Vickers hardness tester. Picture it like a microscopic detective – it uses a microscope (some call it a microhardness tester) to spy on the indentation it creates. Some even come with a programming calculator, doing the math for hardness values super quick and spot-on. And get this, there's a tiny version of the Vickers hardness tester with a minimum test force of just 10 grams – that's like a feather's touch in the world of hardness testing!
7.3 Brinell Hardness Tester
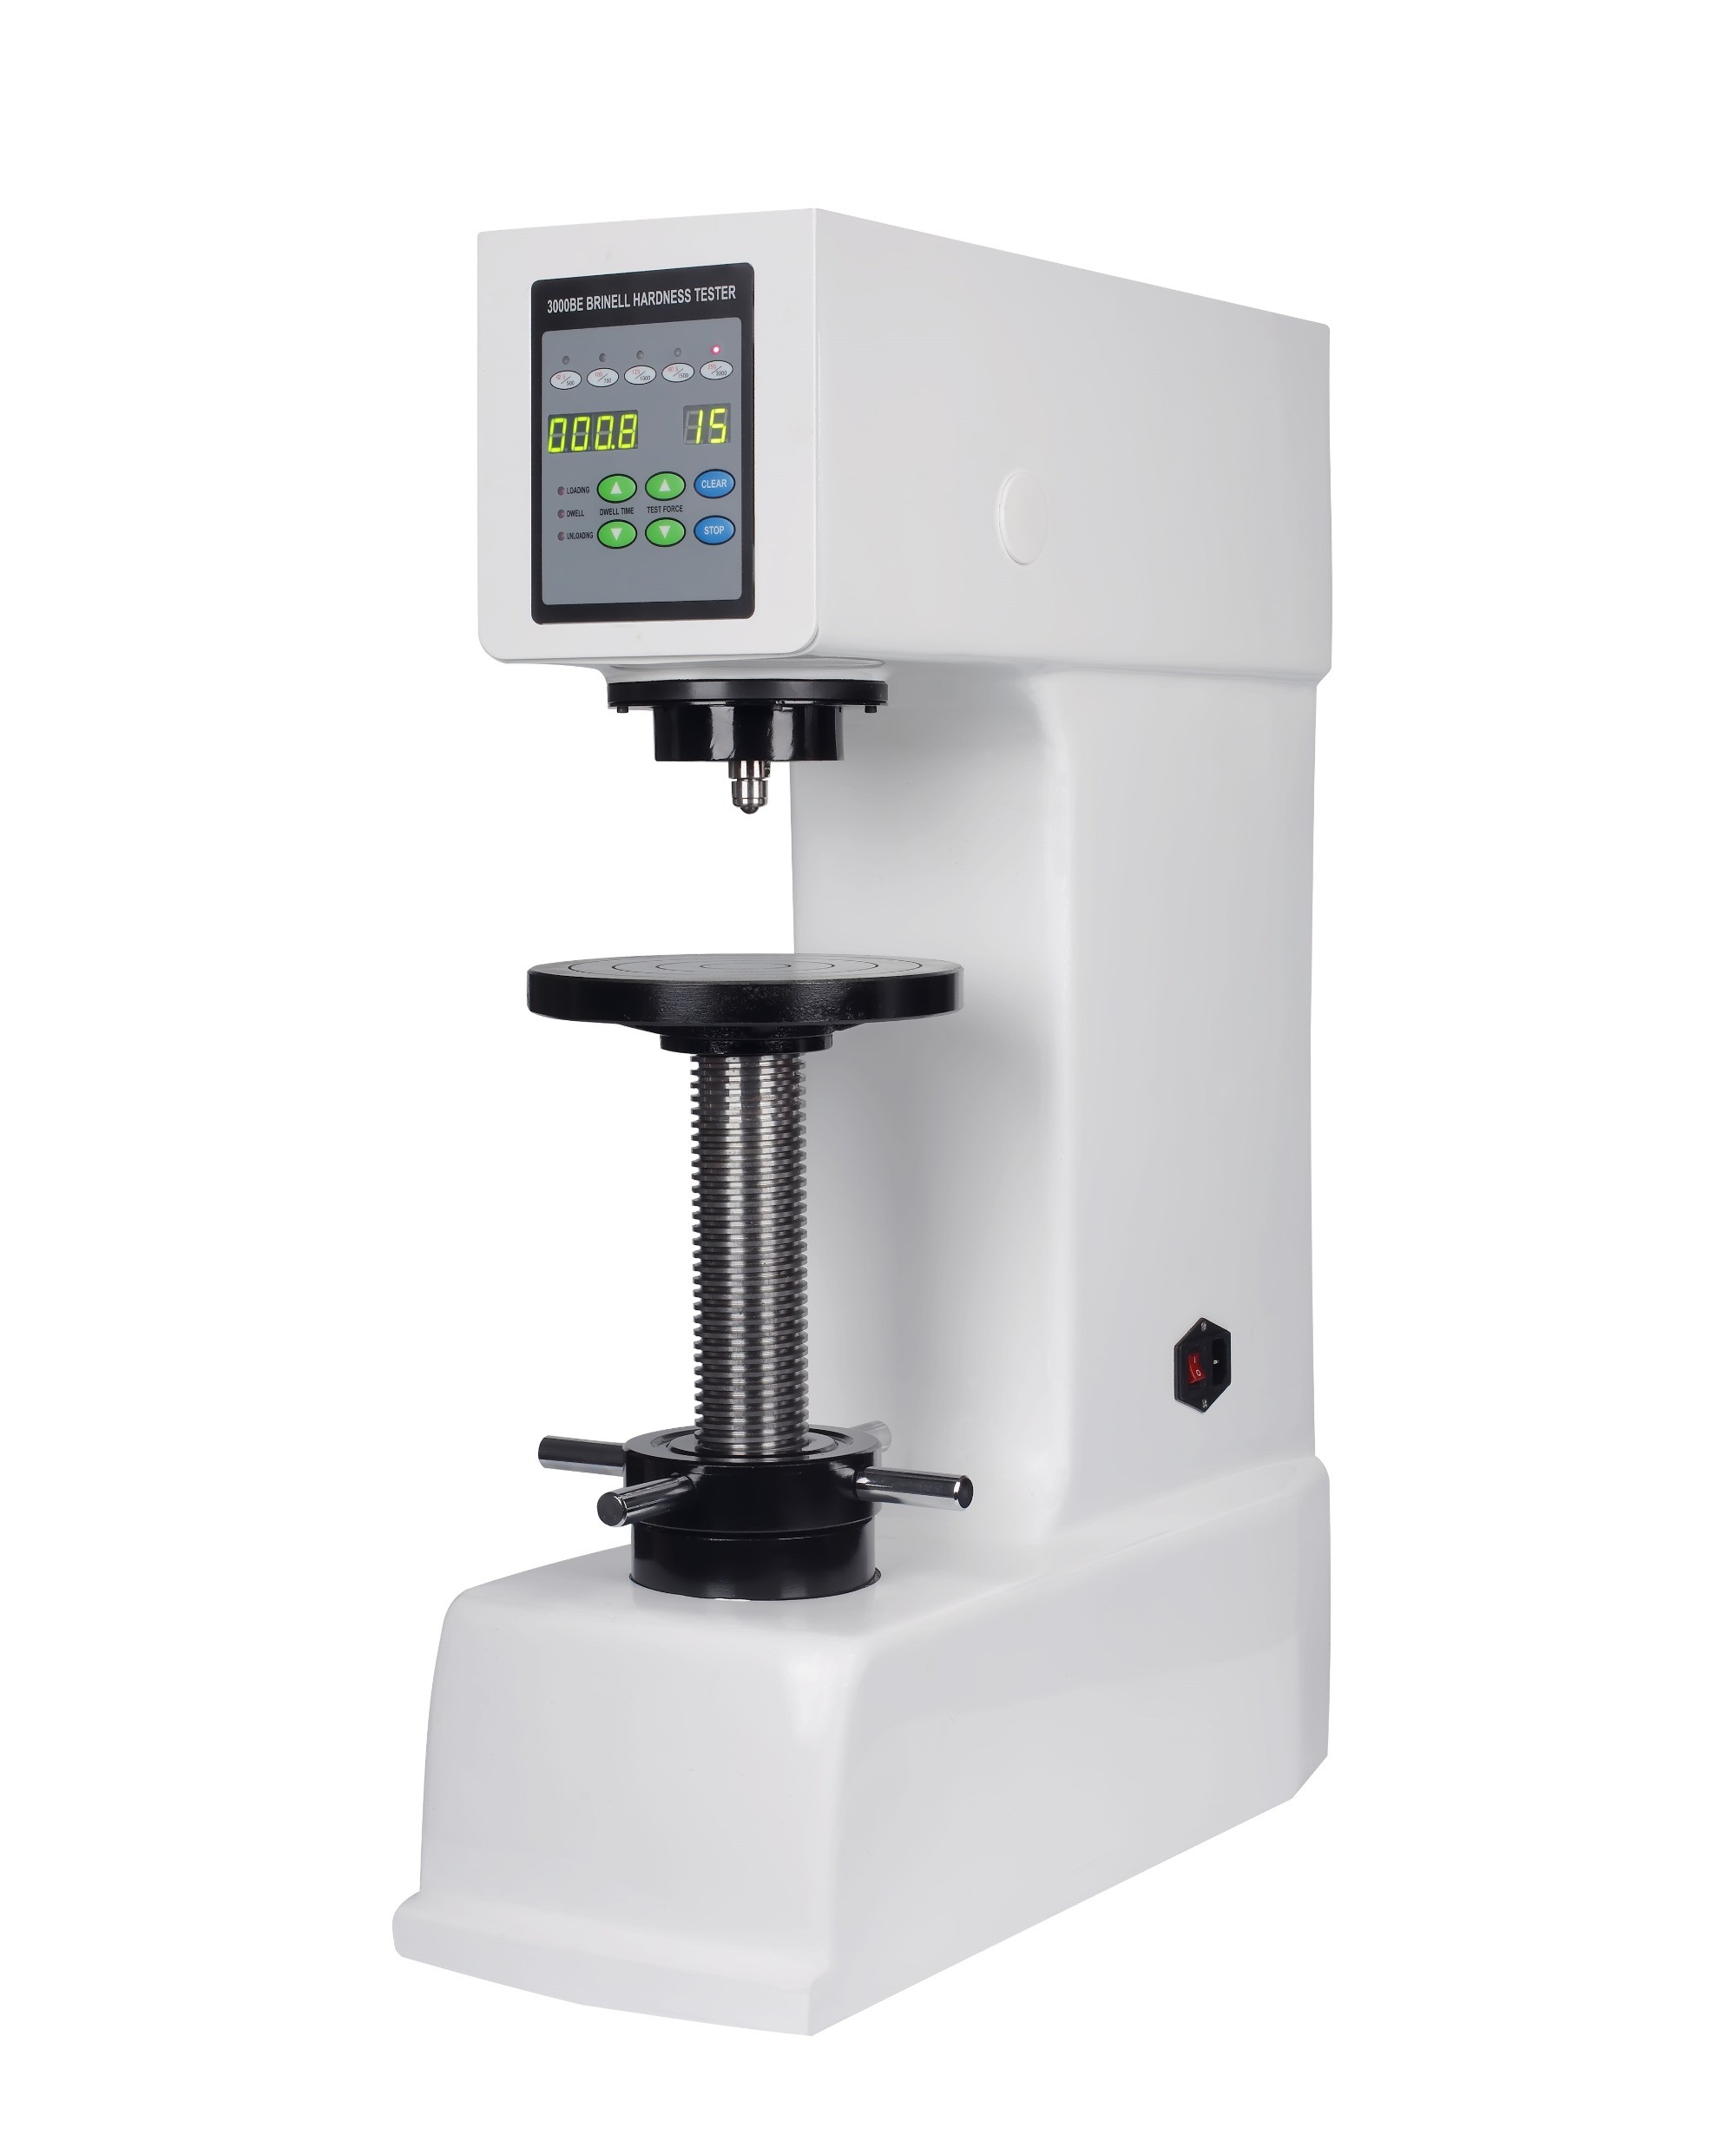
We're talking about checking out the hardness of some everyday materials – unhardened steel, cast iron, non-ferrous metals, and those soft bearing alloy materials. We rate them using something called HBW.
Now, imagine having different tools for this job. We've got your regular digital Brinell hardness tester, but we've also got a portable one for on-the-go hardness checks. There's even a hammering Brinell hardness tester – think of it as the tough guy of the group. And if you're feeling a bit fancy, there's a door-type Brinell hardness tester making sure things stay classy in the hardness testing world!
7.4 Blovi's Hardness Tester
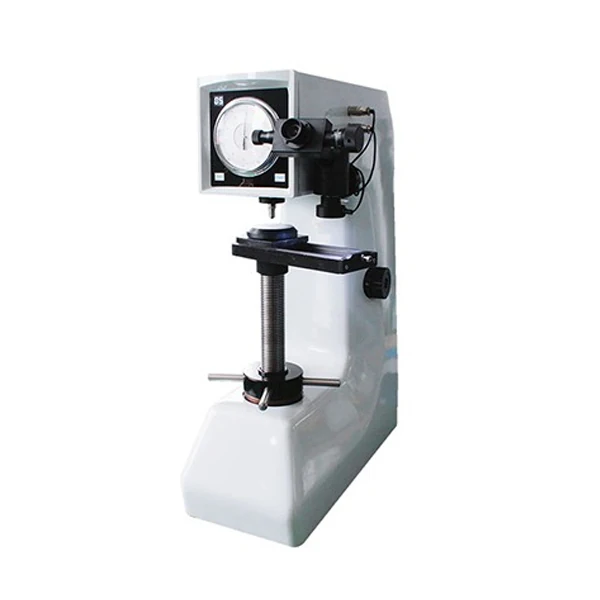
Alright, imagine a hardness tester that's like a triple threat – it can measure not one, not two, but three kinds of hardness: Brinell, Rockwell, and Vickers. It's like the all-in-one package, perfect for those development and research moments!
7.5 Shore Hardness Tester
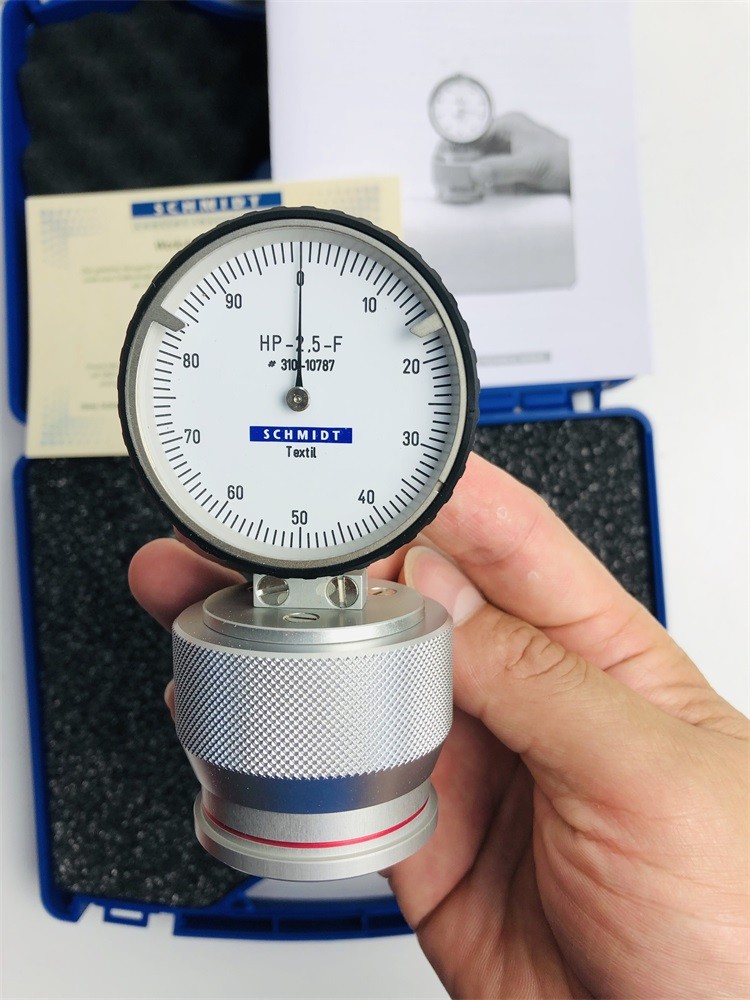
In China, we keep it simple when it comes to standards in this area – just HA and HD. HA is for measuring the softer rubber hardness, while HD is for the tougher rubber or plastic hardness. Now, here's the kicker: some plastics are super tough, almost like "steel" (think gears and heavy-duty parts), and using a Shore hardness tester might not give you the right hardness reading.
Now, let's talk about the Shore hardness testers we have on home turf: the LX-A (great for softer rubber or plastic) and the CY-D (made for the harder rubber and plastic).
But wait, there's more! When we look beyond our borders, Japan's got its ASKER, and the U.S. has PTC – each with its own set of rules. Still, the hardness scale stays between 0-100 degrees. To boost the accuracy of your Shore hardness tester readings, consider using a support device that gives you a rock-solid force during testing. You could splash out on a fancy fixed-pressure loader for more precise results. Just a heads up – the cost of these support gadgets might hit your wallet a bit harder than the hardness tester itself. Here's a little secret: since we're not too fussy about accuracy in rubber hardness here in China, many manufacturers skip the support and keep it simple.
7.6 FISCHERSCOPE Microhardness Test Gauge: Precision from FISCHER in Germany
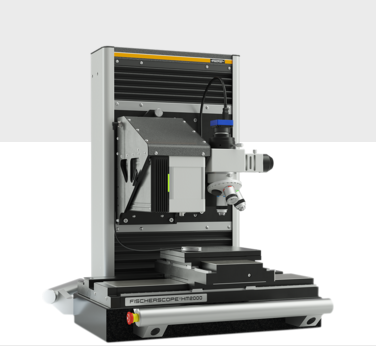
The H100C is a computer-controlled measuring instrument for micro-hardness testing. It is mainly used for hardness measurement of plating layers, paint layers, organic layers, etc., down to 1 micrometer plating layers.
7.7 Leeb hardness tester
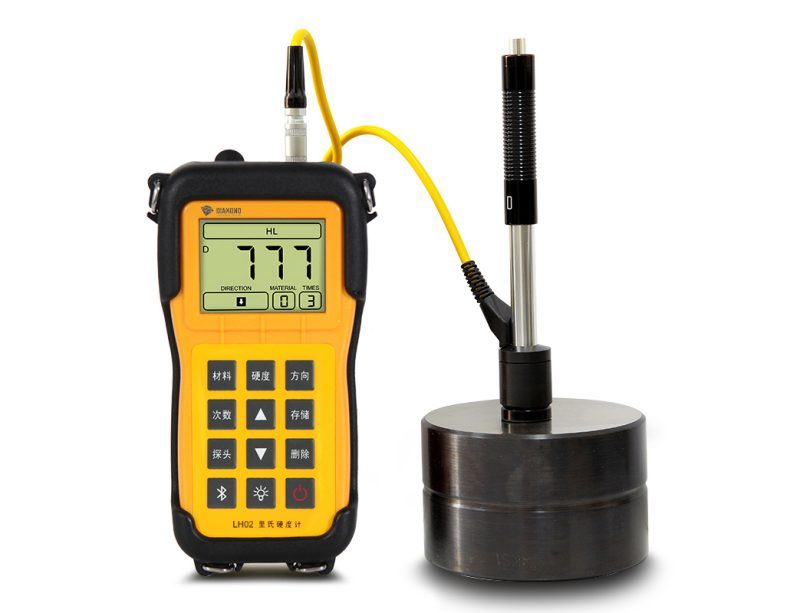
Hey there! Meet this nifty little hardness tester that's like a unit-changing wizard. It's perfect for checking how tough metallic materials are, especially when you're dealing with big pieces. And guess what? There's a bunch of impact devices to choose from, so you can pick the one that suits your needs.
This tester is your go-to for mold testing, especially when those molds are on the larger side. Here's a heads up – China doesn't have a national standard for this, but after testing with the Richter hardness tester, you can easily convert the data. Cool, right?
7.8 Pencil Hardness Tester
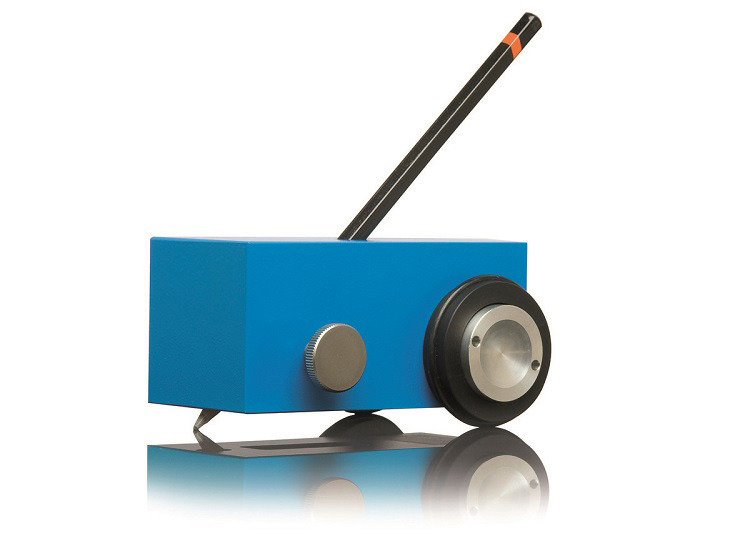
This gadget is like a detective for coating hardness. Picture this – we grab a pencil, stick it in a holder, and let it slide on the coating. By checking out the pencil hardness and the scratches it leaves on the coating, we can figure out just how tough that coating is. It's like solving a little mystery about how strong the coating can stand up to a pencil's tricks!
8.Challenges Of Measuring Metal Hardness
In practice, testing for metal hardness, although one of the key steps in quality control and materials research, faces certain difficulties. The main difficulties are listed below:
8.1 Preparation Of Specimens:
Obtaining representative specimens can be challenging, especially if the metal parts are large or complex in shape. The surface quality and geometry of the specimen are critical to the hardness test results.
8.2 Material Heterogeneity:
Due to the inhomogeneous nature of metals, i.e. the presence of different compositions and crystal arrangements, their hardness distribution may also show differences. In this case, the selection of a suitable test location becomes particularly critical.
8.3 Specimen size:
Some hardness test methods have stringent requirements for specimen size, and smaller or thinner specimens may be subject to testing limitations. In such cases, the use of micro hardness test methods may be a solution.
8.4 Specimen Surface Condition:
Roughness, coatings or corrosion on the surface of the specimen may have an effect on the hardness test results. It is important to ensure that the surface of the specimen is smooth, clean and free from any contaminants before performing the hardness test.
8.5 Specimen shape:
For some hardness tests, the geometry of the sample must be specified. For example, Brinell hardness tests usually require a flat surface, whereas Rockwell hardness tests have more relaxed requirements for the size and shape of the specimen.
8.6 Specimen Position
Detecting hardness test points in large structures and difficult-to-machine parts can be challenging. Ensure that tests are performed at representative locations to obtain comprehensive hardness data.
8.7 Temperature Effects:
High or low temperature environments may affect the hardness of metals. In such cases, the effect of temperature on test results needs to be considered and corrected.
8.8 Material Type:
Various metals will react differently under different hardness determination methods. Therefore, the type of material as well as the characteristic properties must be taken into account when selecting a hardening test method.
Conclusion:
Overall, steel hardness is not only a key parameter in the fields of materials science and engineering, but also the cornerstone for ensuring manufacturing quality, product performance, and structural stability. By continuously innovating and improving hardness testing techniques, we can have a more comprehensive and accurate understanding of the mechanical properties of steel, driving the development of various industries. If you have any questions about the hardness of steel, please feel free to send them to our email: sales@ytdrgg.com We will give you a satisfactory answer as soon as possible.
FAQ:
1 . What Is The Hardness Of Iron?
Hardness, Brinell 146 146 Converted from Vickers for 3000 kg load /10 mm ball Brinell test
Hardness, Rockwell A 49 49 Converted from Vickers
Hardness, Rockwell B 79 79 Converted from Vickers
Hardness, Vickers 150 150
(Data from this article:Iron Fe)
2 . Is Titanium Harder Than Steel?(Is Steel Harder Than Titanium?)
Hardness: Steel surpasses titanium in several respects, particularly in terms of hardness. One of the reasons why titanium is challenging to work with is its low Brinell number. Titanium alloys are commonly used in the industry because small amounts of other metals help to offset titanium's low material hardness.
3 . Is Iron Harder Than Steel?
The addition of carbon is what differentiates iron from steel. By weight, steel typically contains about 2.14% carbon. While this may seem like a relatively small amount of carbon, it leads to significant physical change. For instance, steel is notably harder and stronger than pure iron.
4 . How To Harden Steel(How Do You Harden Steel)?
Steel is heated to its appropriate hardening temperature, usually between 800-900°C, and then held at that temperature before being rapidly cooled, a process known as "quenching," which is frequently done in oil or water. This is followed by tempering, which involves soaking the steel at a lower temperature, resulting in the development of final mechanical properties and the relief of stresses.
5.Hardness Tables for Various Common Metal Materials in China: (downloadable)
Hardness tester and steel hardness comparison table for steel testing


